Help
Follow step-by-step guides to get started with Live Time TV
Performers (providers) have a special dashboard (page) to manage account, room(s)/channel(s) and go Live.
- Update account records will be verify by admin.

- Click on CheckIn options and tag other performers present in session.
- Switch to different room / listing/ channels. Your account can setup and manage multiple room. Select the room/ channel to go live.

- Select Setup tab and fill profile with room image, category, cost price if you want, room access price for client to pay for watching stream etc. and save it.
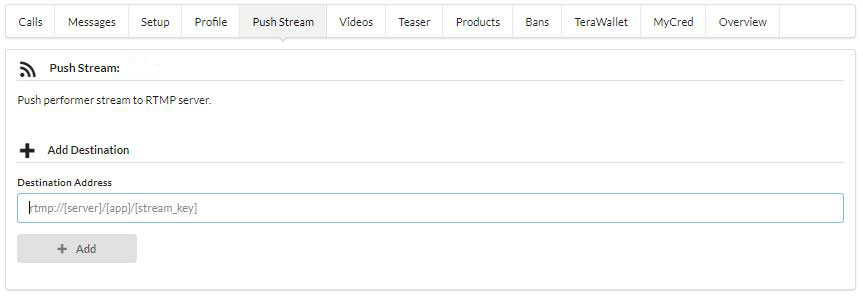
- Select Push Stream to add destination Push performer stream to RTMP server.(See detail on other tab)

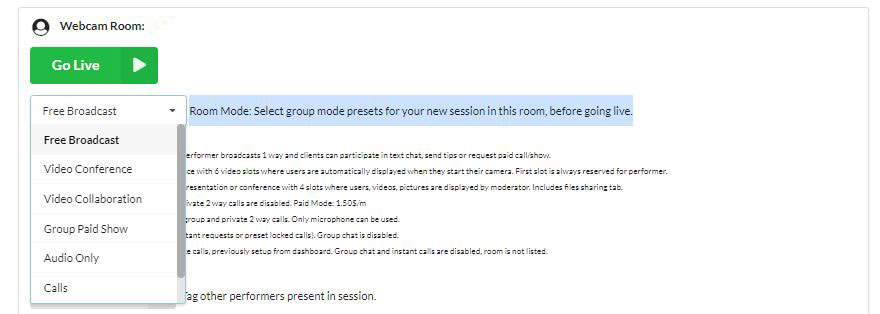
- Select group mode presets for your new session in this room, before going live. Then Click on GoLive Button.
Push performer stream to RTMP server(Facebook, YouTube etc.)
- First enter Stream url: rtmp://abc.rtmp.youtube.com/live2
- Second enter Stream key: abcd-abcd-abcd-abcd
- Example: 1. rtmp://abc.rtmp.youtube.com/live2/abcd-abcd-abcd-abcd
- Example: 2. rtmps://live-api-s.facebook.com:443/rtmp/abcd-abcd-abcd-abcd
Record the stream
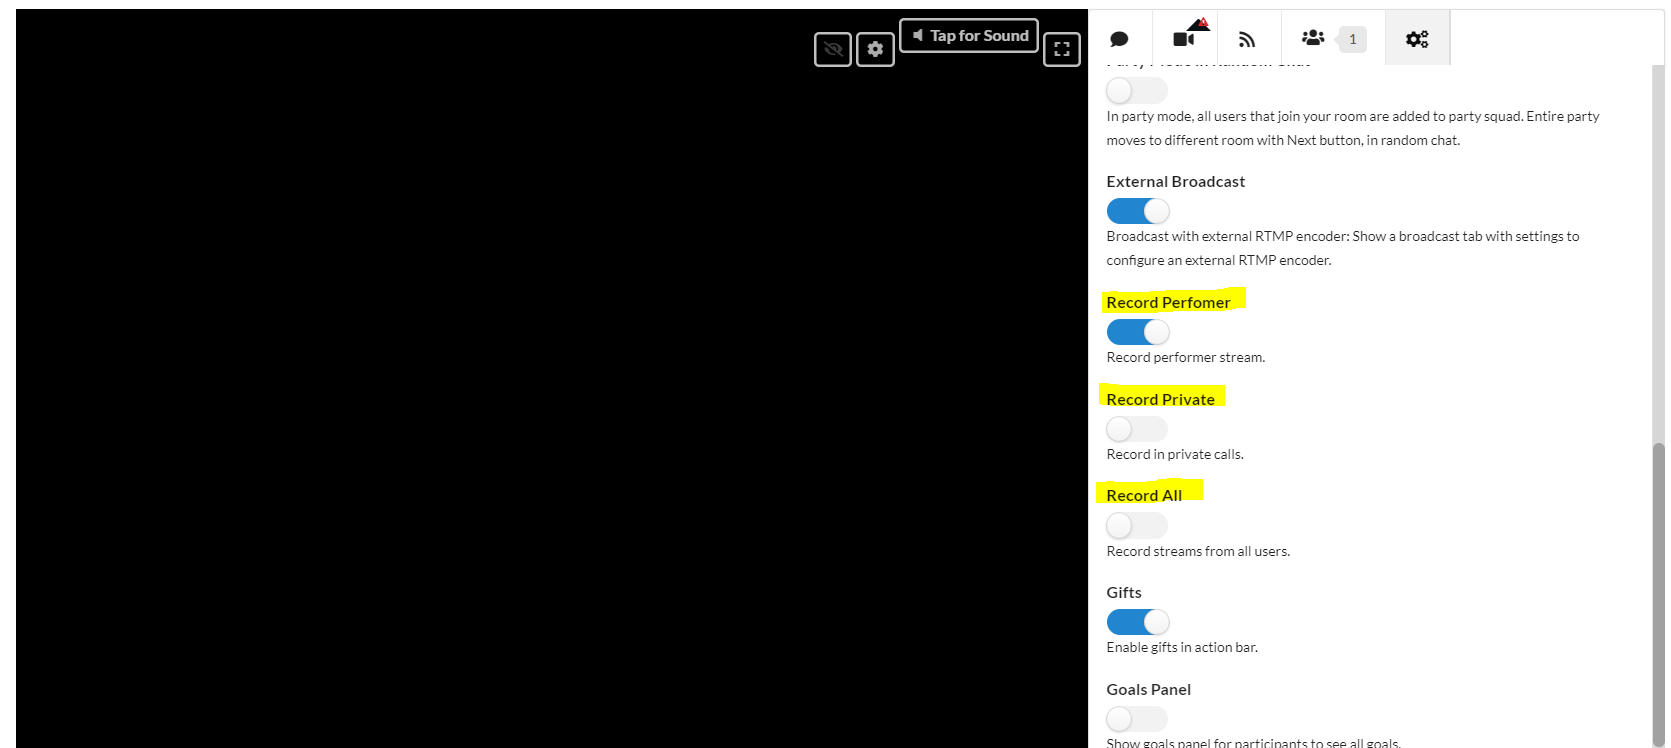
- When performer is live then can select record stream from options.
- There are three options available: Record performer stream, Record in private calls, Record streams from all users.
- Performer has to enable the required options.
- Performer can record streams from OBS software too.
Upload recording video
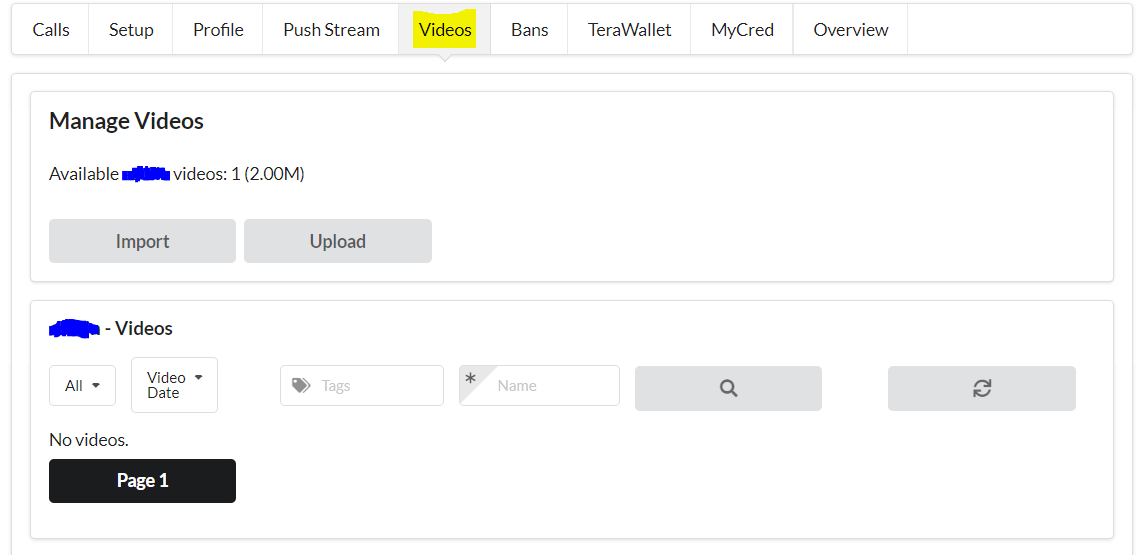
- After closing stream, go to the performer dashboard and select video tab.
- The recorded video will be available in list.
- Select import button to import video on website.
- If performer will select upload button, a form will be shown and then fill out the form and upload video from computer.
- Performer can also delete videos from here.
Video Calls
- There are 2 ways of initiating private video calls:
- Instant videocalls can be requested when performer is live in videochat:
– live from webcam listings
– during group chat
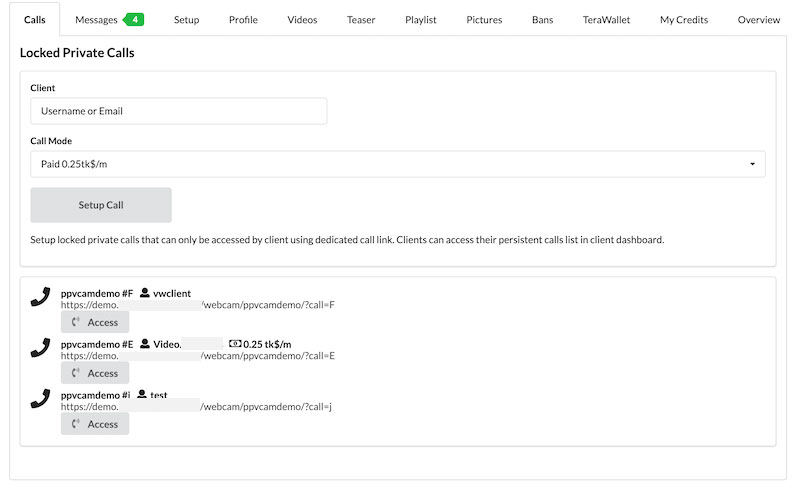
User needs a wallet with tokens to request and participate in pay per minute video calls. All instant calls are pay per minute unless cost per minute is configured to 0 from solution backend. - Locked videocall links can be setup by performer from dashboard for specific users by username or email.
- Each call is restricted to a client and can be accessed by link only by that logged in client.
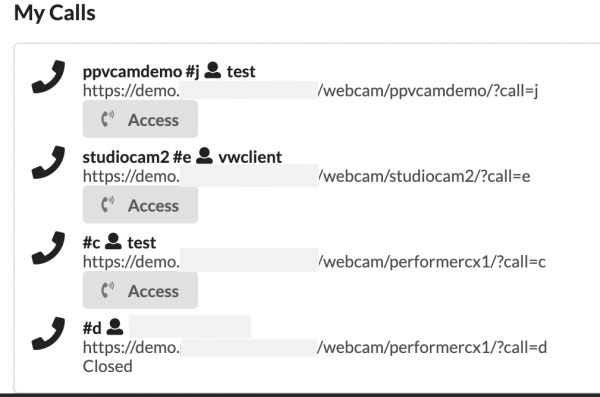
- Client can access a list of all available calls from Client Dashboard.
- Performer can start or live switch room to Calls Only mode: only users with a call link can access.
- Performer can setup locked call as Paid (pay per minute) or Free.
Performer Call Chat Modes
In addition to group chat modes, performer can Go Live in Calls or Locked Calls mode, disabling group chat.
Performers can use call only modes to take calls, without starting group / presale chat.Private Chat / Call Modes
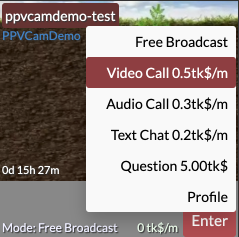
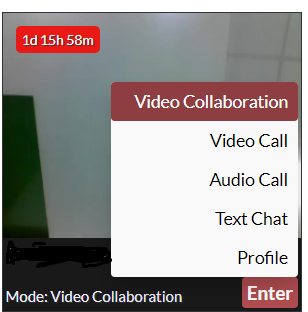
Private chat is available in 3 modes:
– video call (webcam, microphone, text chat)
– audio call (microphone, text chat)
– private text chat (only text chat)
Call mode can be selected by client when requesting from listings menu (instant) or when setup by provider (locked).
Provider can setup both paid and free calls. Different paid call types can have different cost per minute (in tokens/credits using micropayments).
When requested inside group live chat, call inherits group chat mode (video or audio/text only).Video Call Features
- 100% web based, 2 Way, HTML5 live video streaming and chat
- Select camera, microphone, resolution with adaptive bitrate quality options
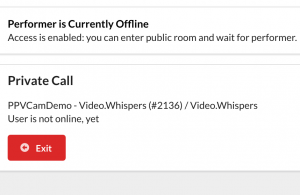
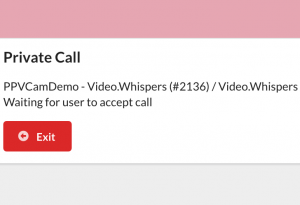
- Wait lobby showing live status until other user is online, available and accepts
- Audio Only mode: website or user (if options are enabled) can be configured in Audio Only mode, meaning only microphone will be available for audio + text calls. Can be used for bandwidth restricted projects or professionals / advisors that don’t want to share webcam.
- Text Only mode: enables using only text chat, without webcam on microphone.
- Pay Per Minute (PPM): Optionally, Cost Per Minute (CPM) can be defined by admin or performer if allowed, for each webcam room.
A grace time can be configured, in example free 30s for setup and warmup until paid session. Cost is displayed in webcam listings and room chat.
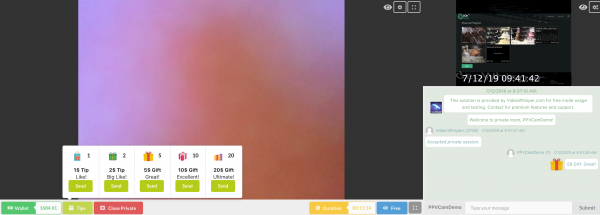
CPM can be configured to 0 to disable pay per minute. - Tips/Gifts: Participant can send tips/gifts to room owner / performer.
Predefine list of tip amounts with icons is configurable from settings. - Each user can configure Dark Mode / Light Mode preference for own interface.
Preference is preserved, unless reset option is enabled from backend settings.Reveal / Uncover Mode
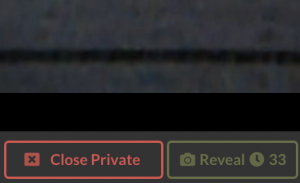
Call can be started with microphone only (chat + audio) and a Reveal button activates after some warmup time.
User can reveal own webcam by choice after warmup time. There’s a timer showing time left until webcam can be uncovered.
Warmup time can be configured from settings or by user if options are enabled in chat interface.
- Instant videocalls can be requested when performer is live in videochat:
Audio Only
Audio only mode where users can only broadcast microphone without camera video. Audio only is effective for users with low internet connections. When using simple interface (Broadcast, Playback, 2 Way) a special interface focused on chat shows for audio only.


- Select video conference from list
- Setup profile accordingly
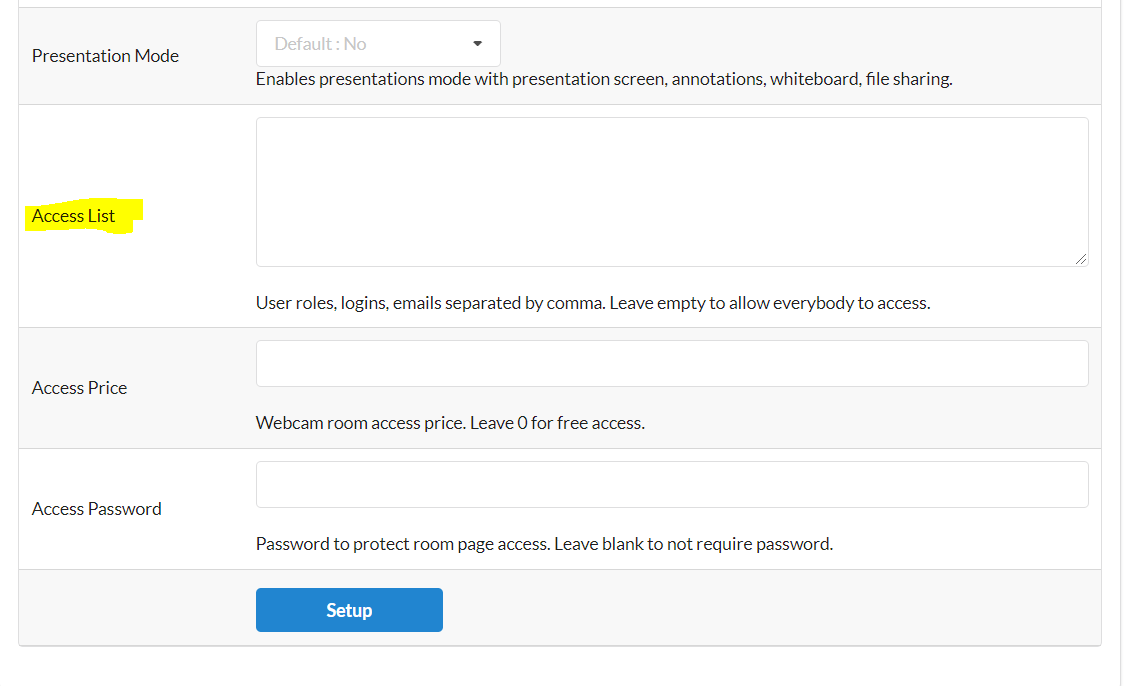
- Performer can add username/email of users who can access video conference.
- After all setup click on GoLive button.

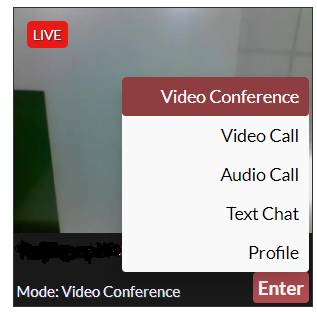
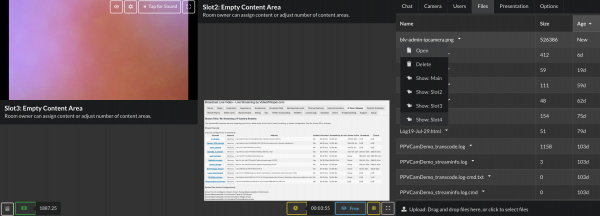
Room owner can start Conference Mode by toggling live from Options tab.
In conference mode, room owner can split display to 2, 4, 6 slots where he can assign streams from participants in Users tab.
When room is in conference mode all participants get a Camera tab to start broadcasting their webcam and microphone.
Users that start their webcams can be automatically displayed in available slots, if configured.
In conference mode, advanced complexity interface (with tabs) is always used to display the advanced features and layout.
- Select video collaboration from list
- Setup profile accordingly
- Performer can add username/email of users who can access video conference.
- After all setup click on GoLive button.


Video Collaboration / Presentation
In addition to conference mode, collaboration includes file sharing and ability to display images and videos in media slots.
In collaboration mode, compared to regular videochat, new feature Tabs are available: Users, Files, Presentation in addition to Chat, Camera panels.
Performer can upload/delete files, display other user cams or images/videos for everybody to see.
Registered collaboration participants can also broadcast their camera, upload files. All participants can open files, watch content displayed by moderator (streams, files).

Paid Questions and Messages
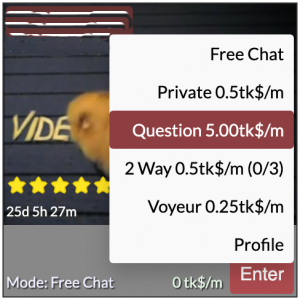
Paid questions and messages feature allows clients to send private messages to providers for a fee.
Client is charged when sending question and performer gets paid on reply (incentive to get an answer).
Feature is great for for expert sites where providers can get paid for an initial consultation, evaluation. It’s also a great channel to clarify paid call details based on exact client case. Can also be used on model sites for clients to send offers or ask private questions when offline.
Clients can access their messages and replies from client dashboard and in messages section from webcam profile.
Performer earning ratio is applied on earnings, similar to pay per minute.
Performers receive payment for paid messages on reply.
Cost per question can be configured from backend settings. Can be 0 to allow free messages (not recommended as that can result in SPAM)
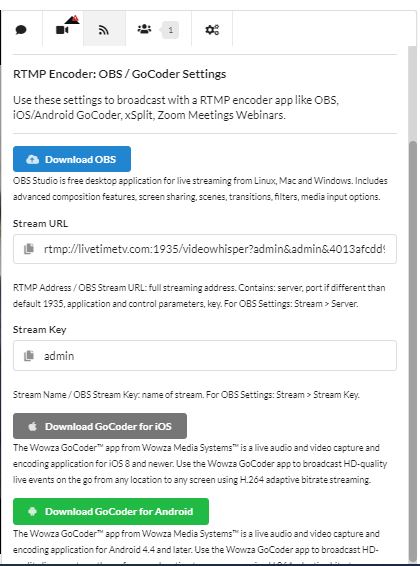
External Broadcast : OBS, GoCoder, Wirecast, Snap Camera Effects, Zoom Meetings & Webinar
Performers can broadcast live video with external RTMP encoders like OBS, GoCoder for iOS/Android, FFsplit, xSplit, vMix, Wirecast, Wirecast Go, Teradek Live:Air Solo, Zoom Meetings & Webinars.
These can be used to build more advanced streaming compositions like shows with multiple scenes, video conferencing panels, transitions, effects.
Performers can easily copy settings (tap to select all) and configure encoder of choice. With those settings performers can broadcast anytime from encoder, without need to access chat.
If also using web based videochat app at same time, broadcast is detected and internal web based webcam broadcasting interface hides.
Playback is done with HTML5 HLS (with some added latency specific to HLS delivery method).
Great to quickly start broadcasts using phone or professional equipment, applications for advanced scene composition, transitions and effects.
Download Open Broadcster Software desktop application and start streaming quickly and easily on Windows, Mac or Linux. Provides high performance real time video/audio capturing and mixing.
Create scenes made up of multiple sources including window captures, images, text, browser windows, webcams, capture cards and more.
Choose from a number of different and customizable transitions for when you switch between your scenes or add your own stinger video files.
Set hotkeys for nearly every sort of action, such as switching between scenes, starting/stopping streams or recordings, muting audio sources, push to talk, and more.
- How to use OBS please see the OBS help
- Open OBS, select setting
- Select Stream
- Service: select custom
- Server: Enter Stream URL from live stream panel
- Stream Key: Enter Stream Key from stream panel
SnapCamera with Snap Lenses can be used for effects when using OBS or other desktop encoder on PC & Mac.
The Wowza GoCoder™ app from Wowza Media Systems™ is a live audio and video capture and encoding application for iOS 8 and newer. Use the Wowza GoCoder app to broadcast HD-quality live events on the go from any location to any screen using H.264 adaptive bitrate streaming. Capture and stream live audio and video content in real time over Wi-Fi, 4G, or 3G.
The Wowza GoCoder™ app from Wowza Media Systems™ is a live audio and video capture and encoding application for Android 4.4 and later. Use the Wowza GoCoder app to broadcast HD-quality live events on the go from any location to any screen using H.264 adaptive bitrate streaming. Capture and stream live audio and video content in real time over Wi-Fi, 4G, or 3G.
-
- How to use GoCoder IOS/Android please see Help
- Select Streaming engine
- Server: livetimetv.com
- port: 1935
- Application: videowhisper?test———- (remaining Stream URL)
- Stream Name: Stream Key
- Click on done
- Go Red button for live stream
- How to use GoCoder IOS/Android please see Help
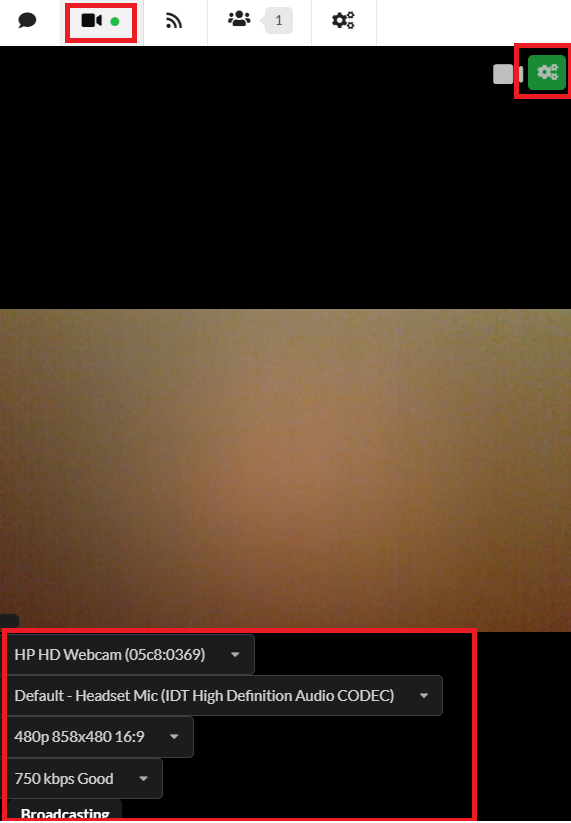
External Camera/Mike
- Attach external camera/mike in your PC and go live
- External camera/mike will be auto select or performer can select from dropdown menu as you can see on picture.
- Performer can select external camera/mike on OBS for streaming.
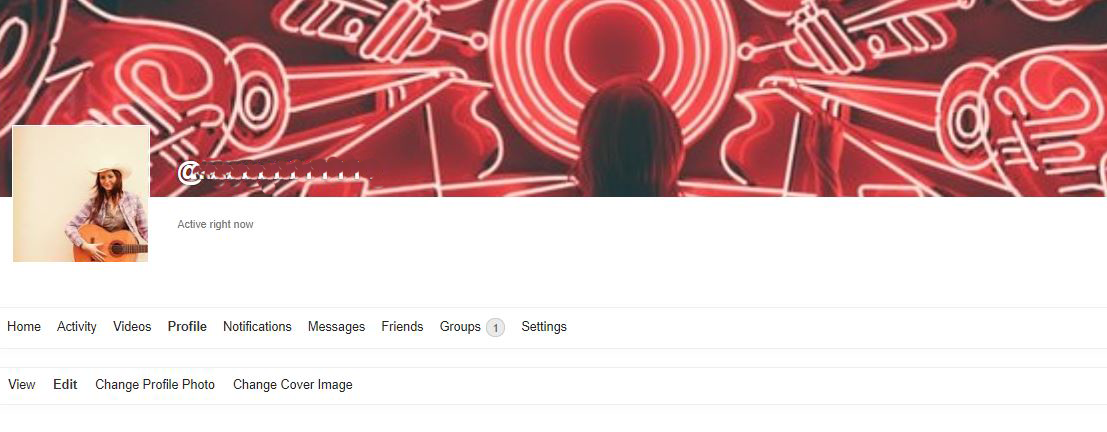
Members can create user profiles, posts messages, make social connections, create and interact in groups, and much more.
Go to top right corner and select edit profile from the account name drop down menu.
- Set your profile page to show others.
- Activity tab: members can share images, posts, and videos quickly.
- Videos: Gold member can create custom channel and upload YouTube videos.
- Messages: Members can send private messages to others.
- Friends: You can add other members in your friend list. Just go to member’s page and select add friend.
- Notification: You will receive all notifications here.
Billing (Tokens/Credits)
Clients can prepay credits (tokens) that show in a site wallet and can be used anytime later in chat to pay for private shows per minute, send tips to performers or access paid content. Tokens can be used for services from different performers and content from different owners, anytime after deposit.
an active wallet can be chosen for videochat activities and tokens can be transferred manually or automatically to that wallet.
Clients spend credits (tokens) in pay per minute private shows or by sending tips to performers or to buy various items.
Performers receive amounts of credits in their site wallet (Admin will charge 10% commission).
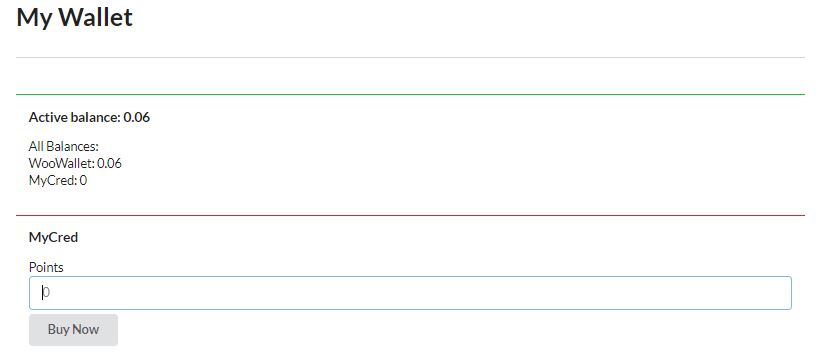
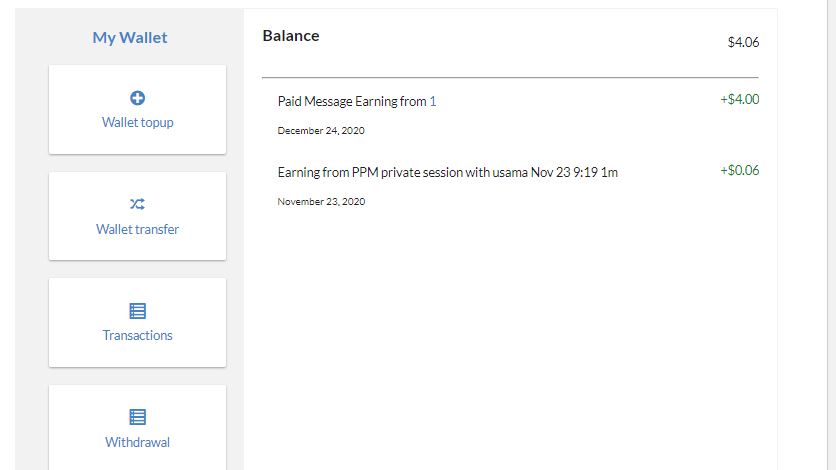
Buy Points
- Click on My Wallet
- Add points in field and click on Buy Now.
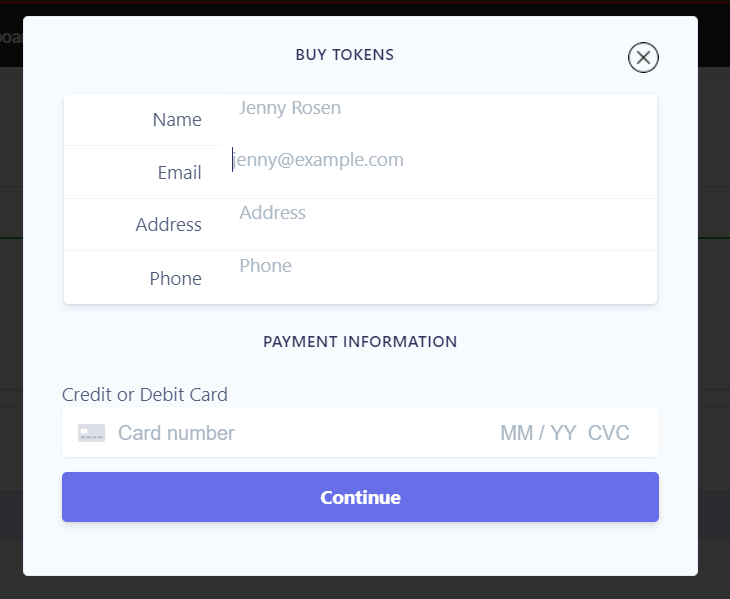
- Select continue and stripe card pop up will be shown.
- Fill out the form and click on continue to buy points.
- When points are purchased then close popup and refresh the page if it is not refreshed.
- These points will be used to buy stream access.

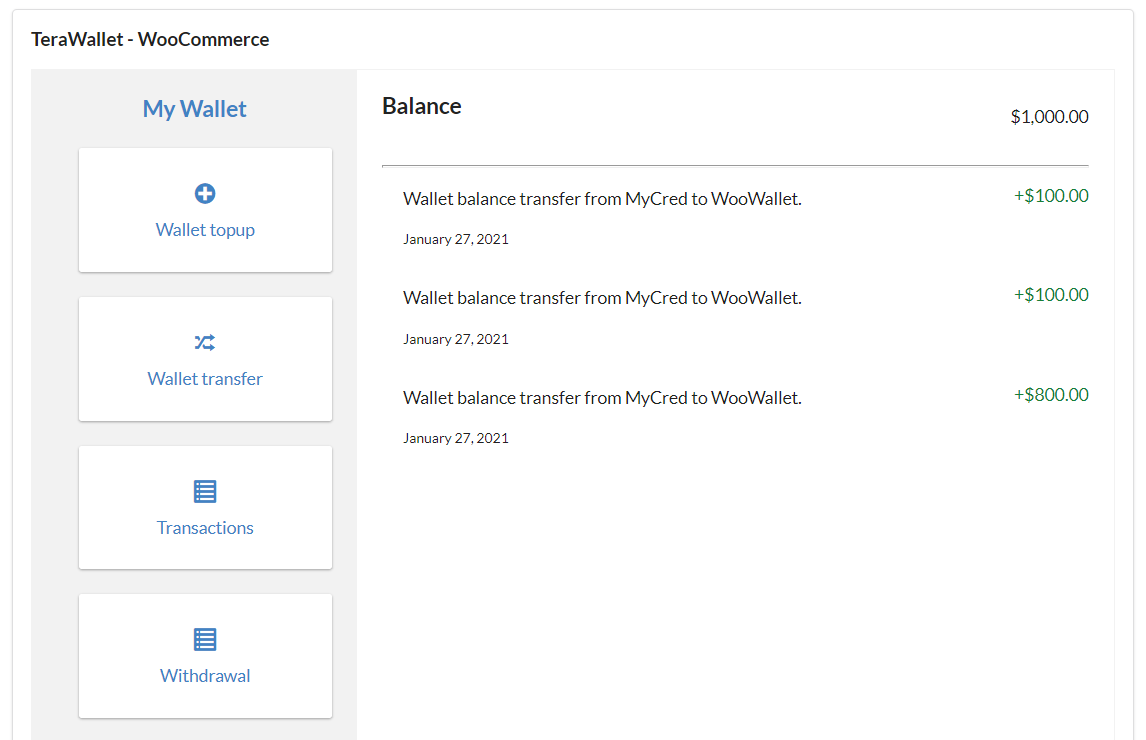
Transfer MyCred Points
- Click on My Wallet
- If you have points then click on transfer button and the points will be transferred into wallet.

Withdrawal Points
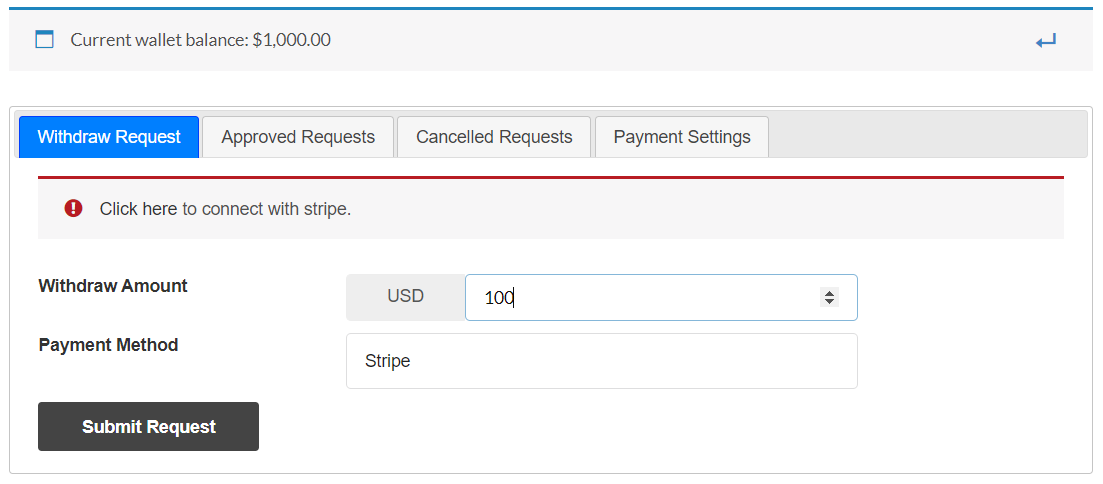
- Select withdrawal from the list.
- Select payment settings and connect stripe.
- Select Withdraw Request and enter Withdraw Amount
- Submit request then points will be transferred into your stripe account.

Live Stream access price
- Pro Plan members can set price for streams.
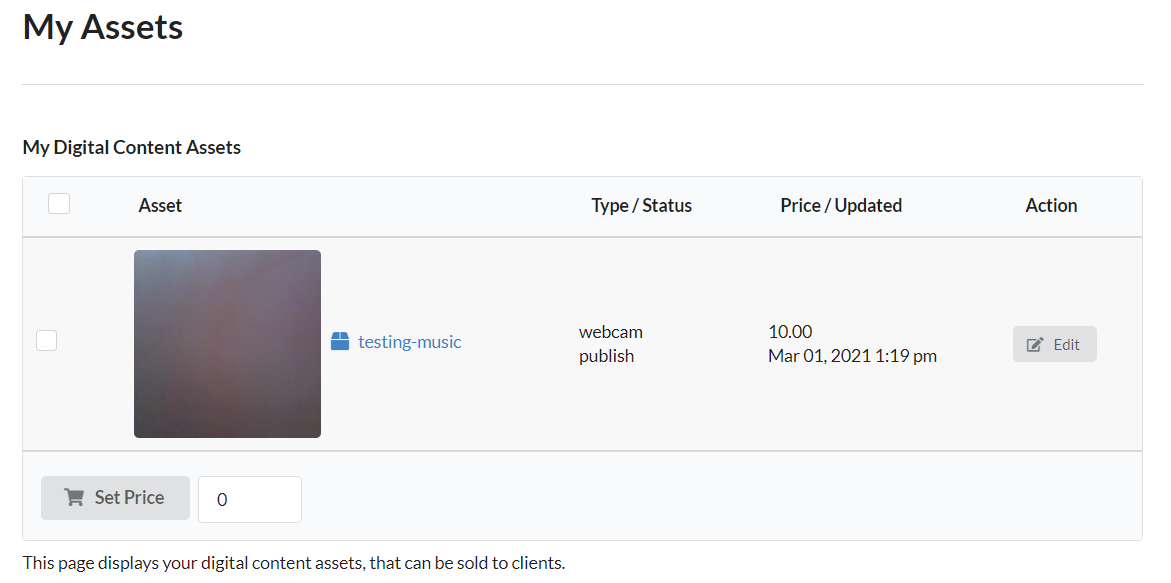
- Select My Assets from menu under performer dashboard tab.
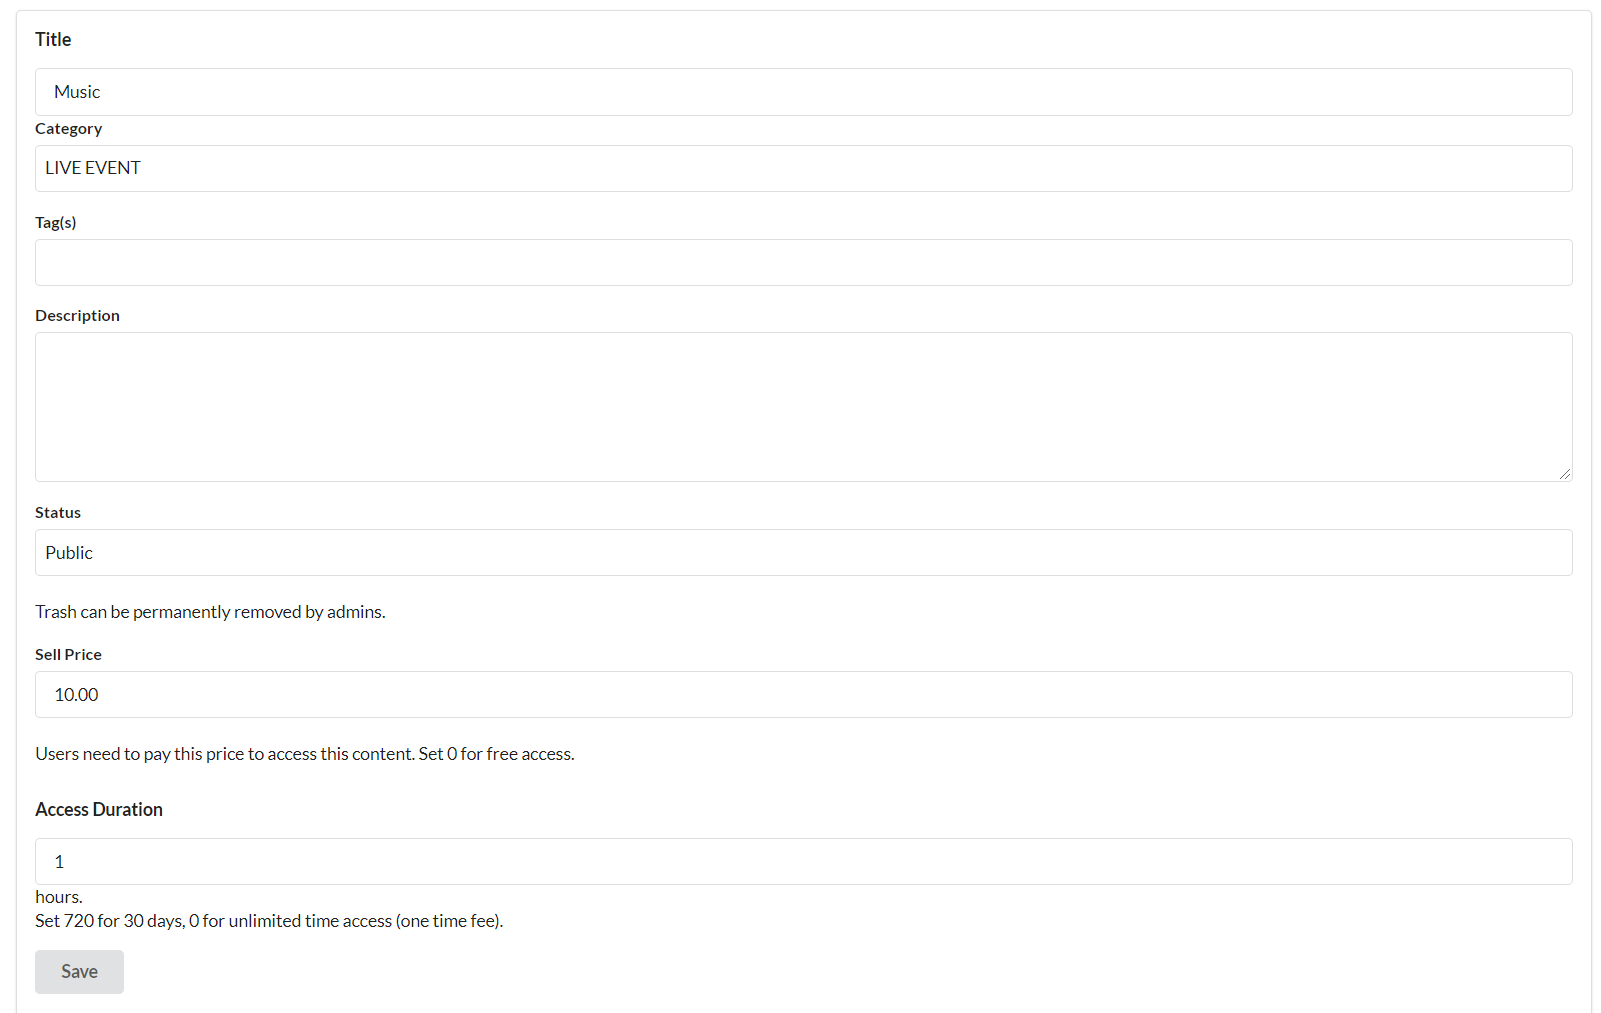
- Click on room edit button which performer want to set price.
- Fill out the all related field and save it.
- All related information will be shown to other users before buying stream.
- Client will pay to watch stream.
Buy Stream
- Member will set price for stream, and user can see price when will go to their stream’s window by clicking on directly or through events.
- If you don’t have points then screen will show to buy points.
- If you have points then you can click on buy button so points will be deducted from your account.


Add Events
- Go to edit profile from the top right corner of user dropdown menu.
- Select events from menu.
- Click on add new button.
- Fill out the all related fields.
- Add webcam URL. (go to webcam room and select URL from browser like https://livetimetv.com/webcam/[name of room])
- Click on submit button.
- Events will be shown on Events page

